If you haven’t done so already, it’s time to update your Twitter profile.
A few weeks ago, Twitter rolled out a new header feature, similar to the Facebook’s timeline banner. It’s a nice change that allows you to personalize and brand your Twitter page.
Below, I give you step-by-step instructions for doing it. It’s simple.
Best of all, once you’ve decided on the image you want to use, you can do it in about five minutes.
What others are doing
Take a look at what some other Twitter users are doing…
Things to think about
I chose the above examples because they illustrate three different ways you can approach your Twitter header:
- Put a picture of you or your business in the header; use your logo as your profile picture.
- Put a creative image in your header; use your headshot as your profile picture.
- Put a picture of yourself in the header, lined up to merge seamlessly with your profile pic. (You’ll need some technical expertise to line up your body with your head in the profile pic. But if you can do it, it’s impressive.)
What type of images could work in your header?
- A promo pic of a product you sell.
- An office shot.
- Where you live or work.
- A hobby or vacation pic.
- Personality shot.
- Customers using your products or meeting with you.
- A special event you host.
- A book or books you’ve written.
Don’t worry about a right or wrong way to do this. Like your Facebook Timeline banner, this is a place where you can express your creativity. Try different ideas on for size. Plan to change your header pic regularly. Have fun with it.
One thing you may want to consider: Your bio is printed in white across the bottom of your header. To keep it readable, try to reduce busy-ness in the bottom-center of your header image. Go with a color that will make your bio pop.
How to set up your new Twitter header
First, create your header image in Photoshop:
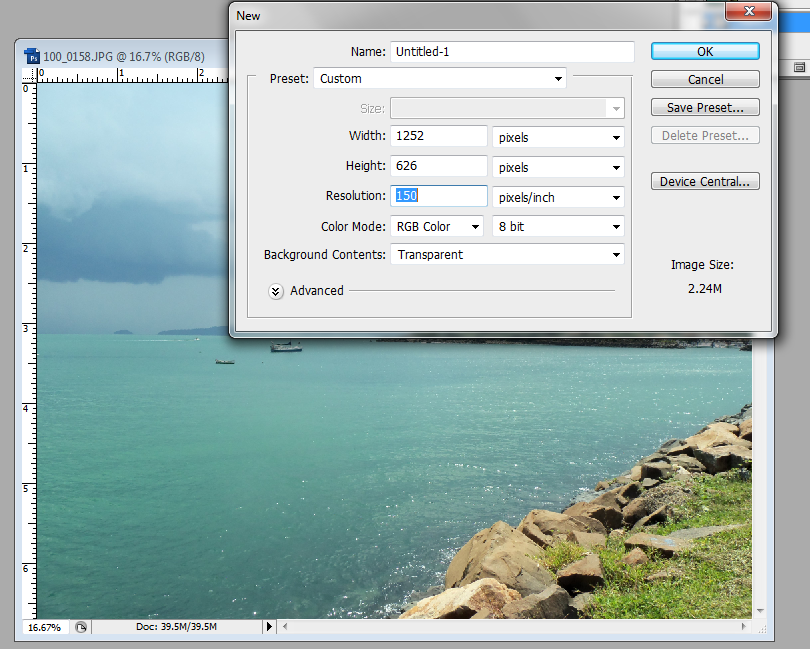
- In Photoshop, open the picture that you’d like to use as your header image. Then create a new file that’s 1252 x 626 pixels. (The header dimensions are 1200 x 600 pixels, but you’ll do get better results creating an image that’s 1252 x 626 pixels.)
- Drag the existing photo into your new file and, if necessary, use Transform (control-T) to adjust its size. Adjust placement of the image to create an attractive layout.
- Save as a PSD file, then Save for Web & Devices.
Next open your Twitter profile and update your header. Here’s how:
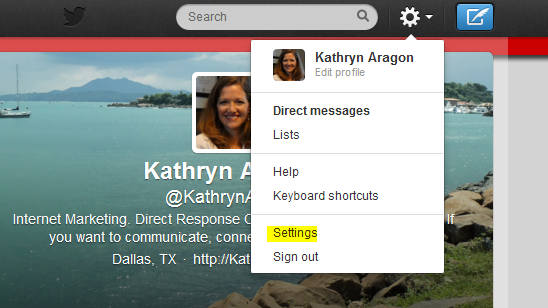
At the top of your profile, click on the “gear” beside the search bar. A menu will drop down. Select “Settings.”
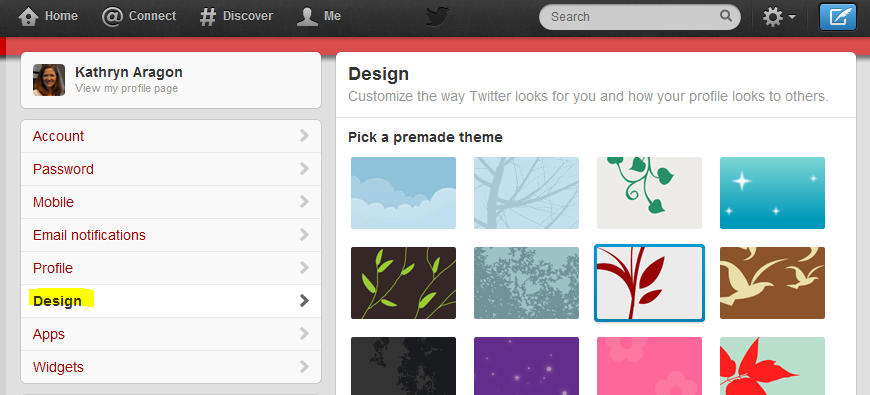
On the left, you’ll see options for managing your Twitter profile. Notice that you can change your profile picture here as well. But for now, select “Design.”
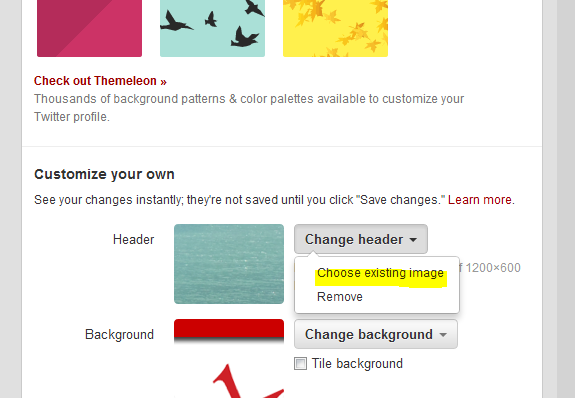
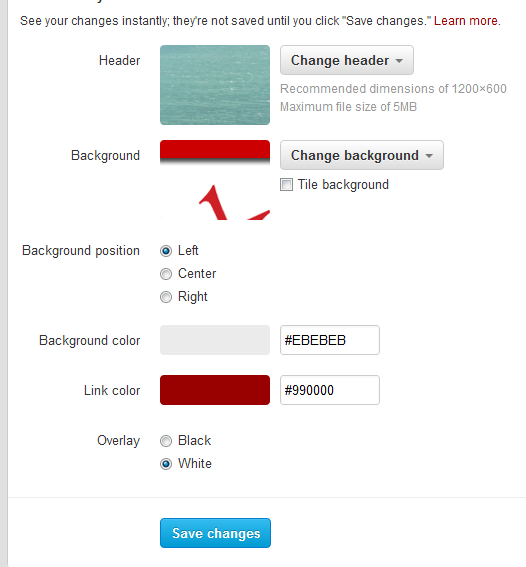
You’ll see premade themes immediately to the right. Scroll down to the “Customize your own” section. “Header” is your first option, and if you haven’t uploaded an image, the thumbnail will be gray.
Select “Change header,” then “Choose existing image.” Upload the image you just created in Photoshop.
You’re not done yet. Scroll down and click “Save changes.”
To see how it looks, above your account options (the menu on the left), click your Twitter name. You’ll land on your profile page with your new Twitter header.
So far there are no rules about what you can and can’t put in your header image. Be promotional if you’d like. Include calls to action if they work. But as you can see, there’s not a lot of room, and if the image is too “busy,” your followers won’t be able to read your Twitter bio.
Give it a try, then leave me a comment about how it works for you.


